
In this article I will cover the basics of deploying and using an ERC-721 contract, a.k.a. a non-fungible token or NFT.
If you just landed on this article (and are new to Solidity programming), I would suggest that you take a look at my 2
other introductory blog posts: Hello Ganache and Hello Truffle.
They will help you understand some basic concepts and guide you through the setup of some basic tools on your computer.
Fungibility (or not)

Photo by Kyaw Tun on Unsplash
Let’s start with the dictionary definition of “fungible”
1: being something (such as money or a commodity) of such a nature that one part or quantity may be replaced by another equal part or quantity in paying a debt or settling an account
Oil, wheat, and lumber are fungible commodities.2: capable of mutual substitution : INTERCHANGEABLE...the court's postulate that male and female jurors must be regarded as fungible
So, inversely, non-fungible is anything which is unique, which cannot be substituted for something equal or identical. A corollary of the above is that, in most cases, non-fungible items cannot be divided in sub-items (e.g. like a euro is sub-divided in 100 cents).
The typical example here is art, where each work is (usually) unique. Another example is property and by extension
ownership titles. Thinking a bit more widely we can find other non-fungible items: event admission tickets,
insurance contracts, bonds and certain debt instruments, limited edition physical world items (e.g. watches, jewelery),…
the list goes on.
Let our imagination wild, and even personal time is non-fungible: you are unique in the world and so is each day and hour
of your life.
An astute observer of these quick examples might notice the common theme of scarcity.
A non-fungible “thing” is also scarce; there is a fixed supply of it, we cannot make new identical items at will.
Ethereum’s implementation
ERC 721 is a set of Ethereum smart contract APIs allowing the digital representation of non-fungible assets.
It is composed of 3 interfaces:
- Core ERC 721 interface
Allows for transfers of tokens between addresses (and optional approvals of these transfers) - “Metadata” extension (optional)
Defines an individual token name and, most importantly, an external URL from where a client can retrieve a metadata JSON document. - “Enumeration” extension (optional)
The NFT contract can maintain a full list of issued NFTs, tracking their current owner.
The reference (and “gold standard”) implementation of ERC 721 is OpenZeppelin; we will base our implementation on it. The latest implementation of the OpenZeppelin contracts at the time of writing this is 4.0.
The idea

Photo by Kelly Sikkema on Unsplash
Let’s keep things simple.
The NFT will represent an 8-bit colour, and… that’s it! What can be scarcer, more unique and more desirable to acquire
than 256 colour codes?!
To make things a bit more interesting, each token will:
- have a global
idcorresponding to the XTerm color id 1, - a
namecorresponding to the same XTerm mapping, and - a free text
title, configurable on initial minting.
The contract itself will pre-mint a few tokens in advance and assign them to the contract owner.
Anyone can claim an unminted token (color) using their Ethereum wallet; they will need to pay the knock-down price of 0.01 ETH
(10000000 gwei) for the privilege.
Once they own the token, they are able to “hodl to the moon” or trade in a NFT marketplace.
We will also create 2 simple Node apps, for better user experience:
- a server-side to provide the token’s metadata, and
- a client-side dApp to allow anyone to claim and purchase a yet-unclaimed token from our website.
The project
The project is an adaptation and simplification from the Kie codes channel video series. All credit goes to the original author, all mistakes are mine.
The contract itself was created using the OpenZeppelin wizard. The color picker at the heart of the client application is the easy-to-use react-color.
I have packaged the project as a ready-to-run Truffle box. Run the following command in a new folder on your machine.
1
truffle unbox sgerogia/hello_nft_box
Building and testing
Let’s start by compiling the Solidity contracts. Open a terminal in the unboxed project’s folder and…
truffle compile
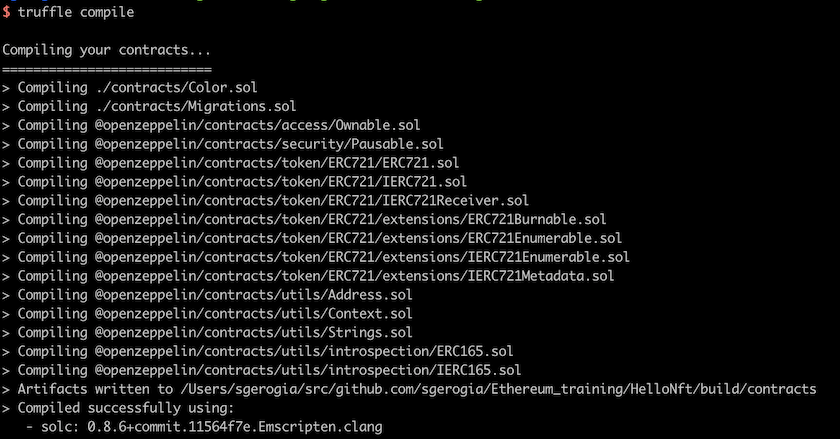
We can see a number of contracts in the output; these are the OpenZeppelin base contracts we inherit functionality from.
Let’s run the contract’s test suite. You can create a CoinMarketCap API key, if you want to have a visualisation of
contract costs in fiat currency (USD/EUR/…). Otherwise omit it from the command.
COINMARKETCAP_API_KEY=<YOUR_KEY> truffle test
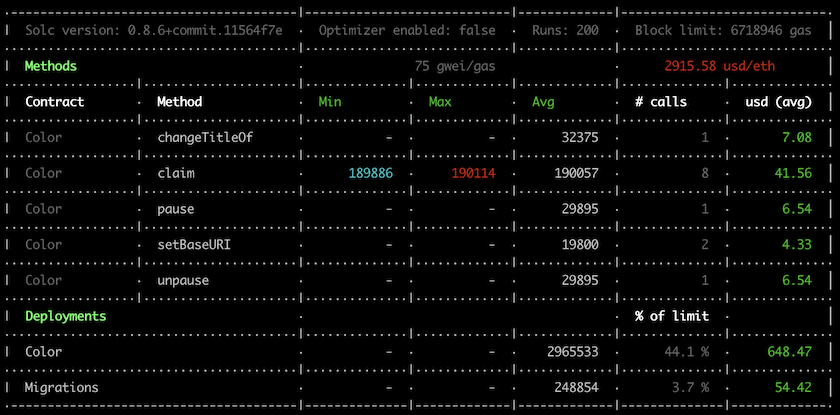 In between the unit test output, the eth-gas-reporter plugin gives us a nice cost report of all contract operations
invoked in the test suite.
We can control the cost with the
In between the unit test output, the eth-gas-reporter plugin gives us a nice cost report of all contract operations
invoked in the test suite.
We can control the cost with the optimizer setting, to an extent. Changing to false
and repeating the test, we can see there is a tangible difference in cost. Your actual values will vary according to the
current ETH market price.
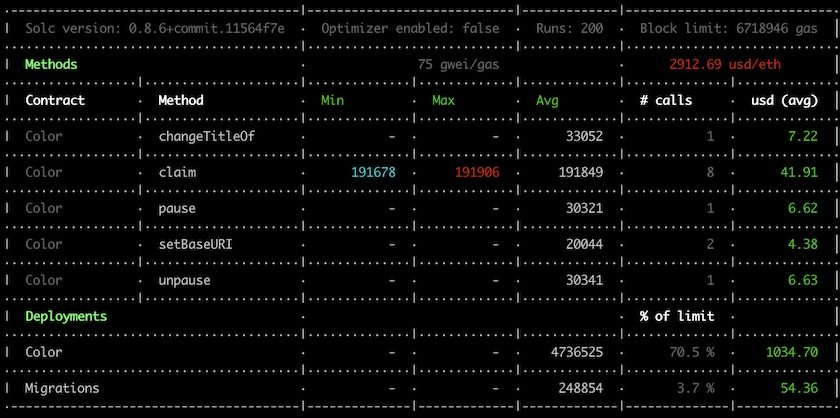
The cost ramifications of contract code complexity is a recurring pattern in Solidity programming.
Manual interaction
Before anything else, follow the steps in the annex to install Metamask and connect it to Ganache.
We start by deploying the contract.
truffle migrate --network ganache
Take a note of the Color contract address in the terminal.

We now need to make Metamask “aware” of our NFT token.
Connected to the Ganache network and with the 1st Ganache account in scope, we add a new token.
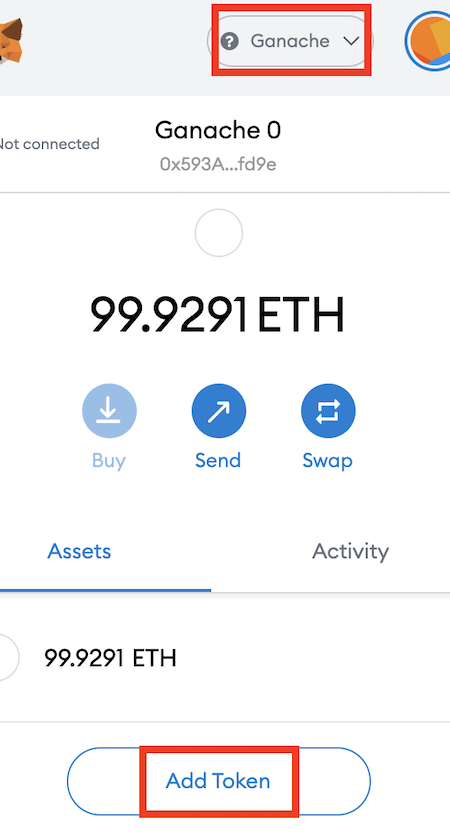
Pasting the contract address auto-populates the token name. When we click “Next”…
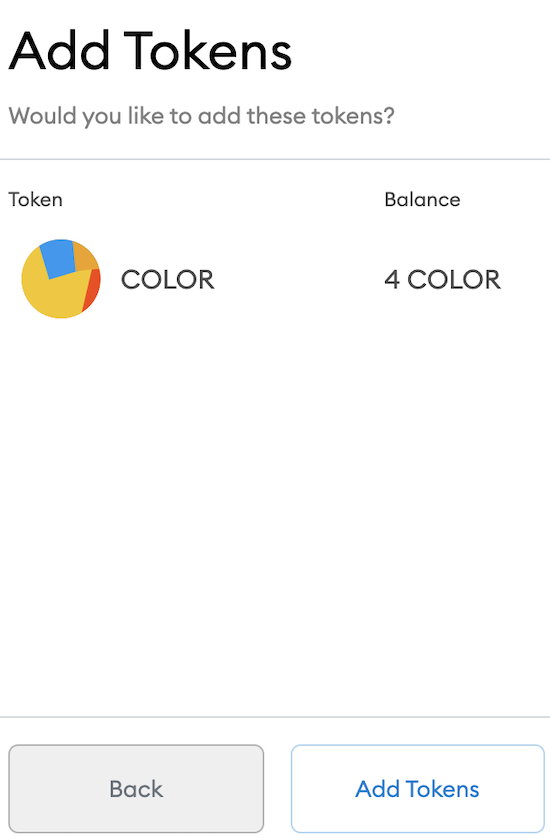
we can see the first 4 colors. Remember that these were auto-minted on contract creation and belong to the contract
deployer (by default, the first Ganache account).
Pretty cool!
Open a Truffle console to mint a few more COLORs (truffle console --network ganache).
Let’s start by trying to get one for free from our 2nd Ganache account. Type the following into the Truffle console
1
2
Color.deployed().then(function(instance) {colorApp = instance;})
colorApp.claim(6, "Real Teal", "This is the really real Teal!", {from: accounts[1]})
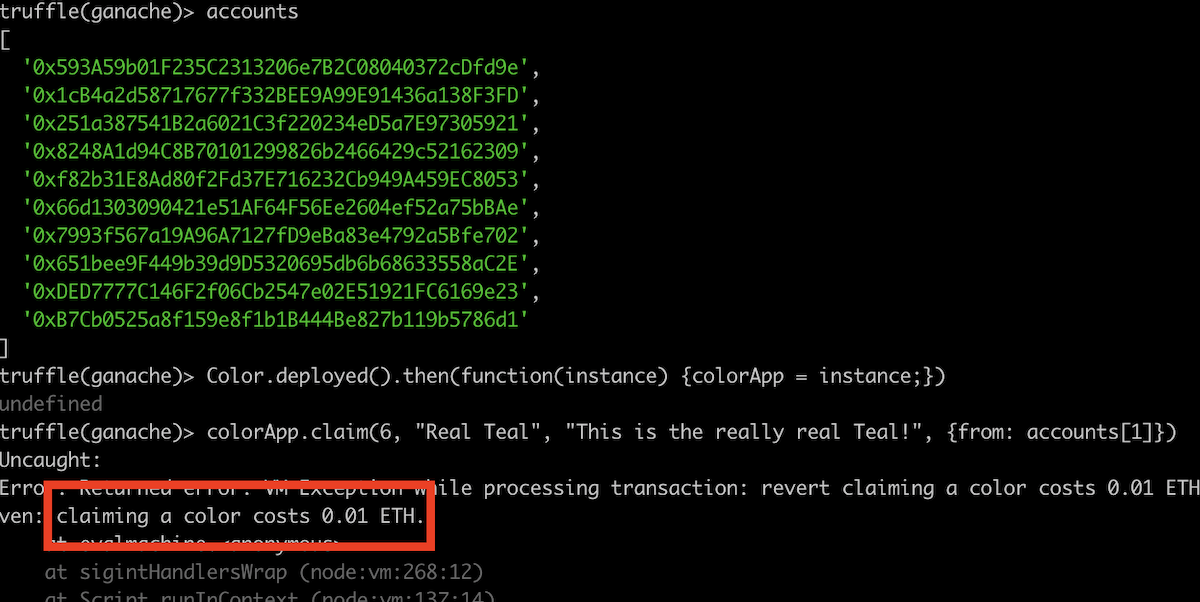
The call fails due to the check inside the claim method.
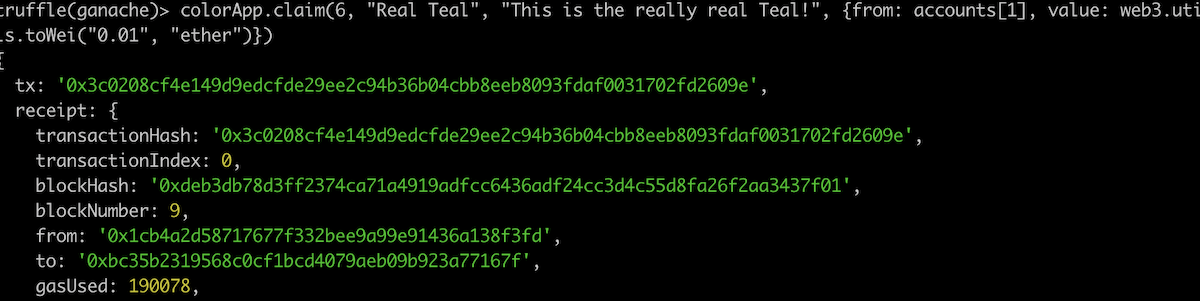
Repeating with the correct amount gives us a valid transaction.
1
colorApp.claim(6, "Teal Teal Teal", "How real do you feel color Teal?", {from: accounts[1], value: web3.utils.toWei("0.01", "ether")})
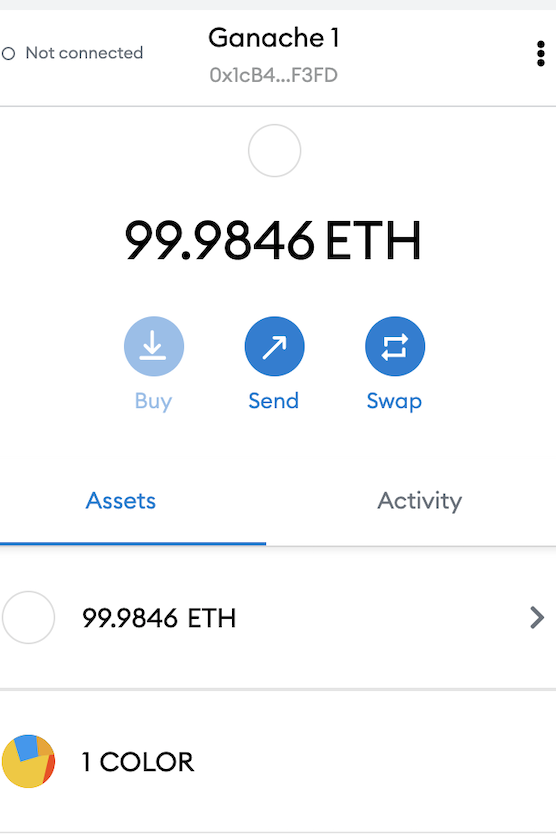
Adding the COLOR NFT to the 2nd Metamask account, shows us that we have successfully purchased the token.
2
Let’s try to double-claim a token from another account.
1
colorApp.claim(6, "YOLO Teal", "I love Teal and I will steal it!", {from: accounts[2], value: web3.utils.toWei("0.01", "ether")})

As expected, the contract enforces uniqueness.
Using the dApp
It’s now time to use our React dApp to give a better user experience.
Start by running the utility script from the top-level project folder.
1
./scripts/compile.sh
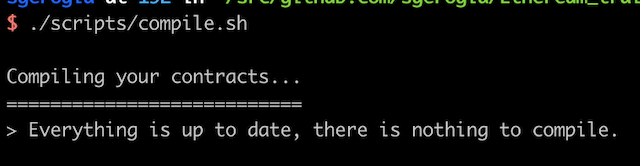
It copies the compiler’s JSON output to the React apps’ folders. This will allow the Web3 client to create a
contract client instance, using the ABI.
Now it’s time to run our metadata server. Copy the local contract address to the below command, which you will run
inside the app directory.
1
NETWORK=ganache CONTRACT_ADDRESS=<local contract address> npm run start
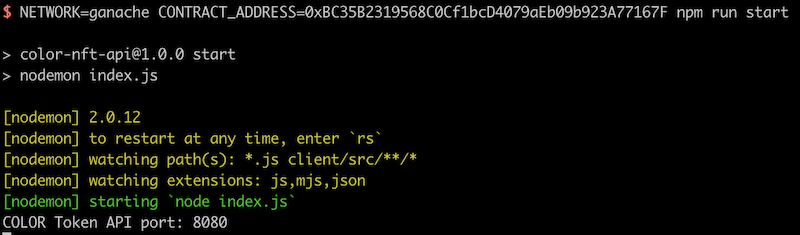
The server starts and listens on port 8080.
Let’s manually call the metadata endpoint for a token we minted previously (in a browser’s address bar or using curl).
1
http://localhost:8080/token/6
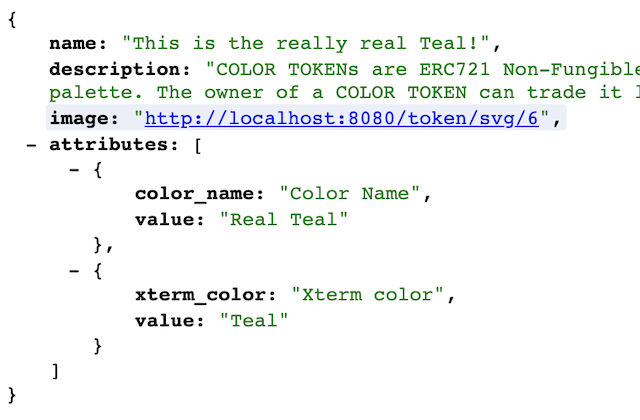
We can see the information JSON returned as per the EIP 721 schema. In our case we return a combination of information
retrieved from the contract and generated on-the-fly by the Node.js application. There is also an additional attributes
key-value enumeration, supported by OpenSea. We will have a chance to see this in action in a future blog post.
With our server still running, let’s launch our client and connect it to our Metamask. Inside app/client let’s run
1
REACT_APP_API_BASE_URL=http://localhost:8080 REACT_APP_CONTRACT_ADDRESS=<Ganache contract address> npm start
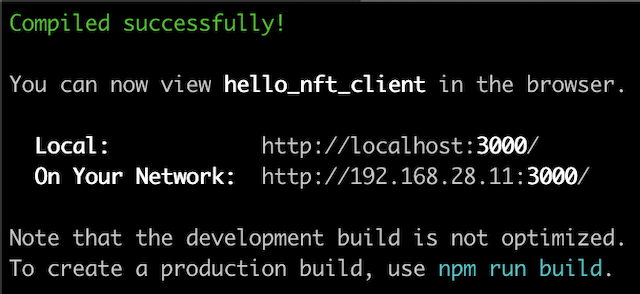
The browser opens and prompts us to allow the dApp to connect to our Metamask accounts.
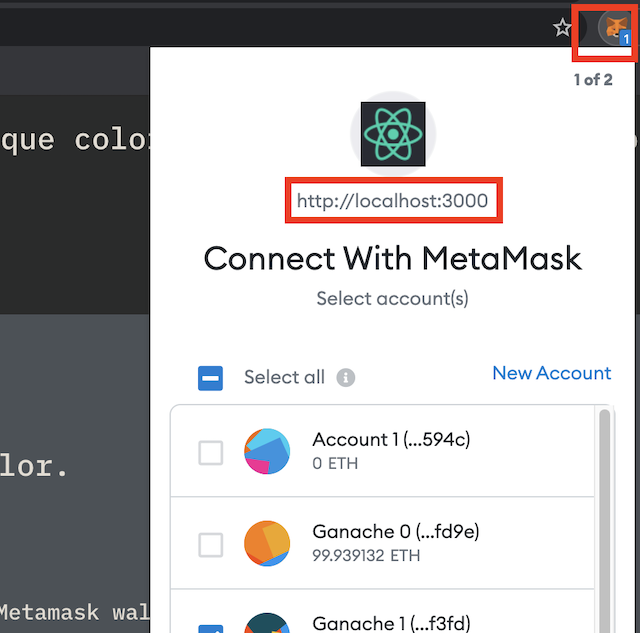
Tick your Ganache accounts and confirm the connection. Behind the scenes, the dApp is now fully connected to
- the contract deployed on our Ganache node (via the environment variables passed as command line arguments), and
- our Metamask wallet and the accounts we gave permission to.
We can now select colors from the palette and see if they are free or taken.
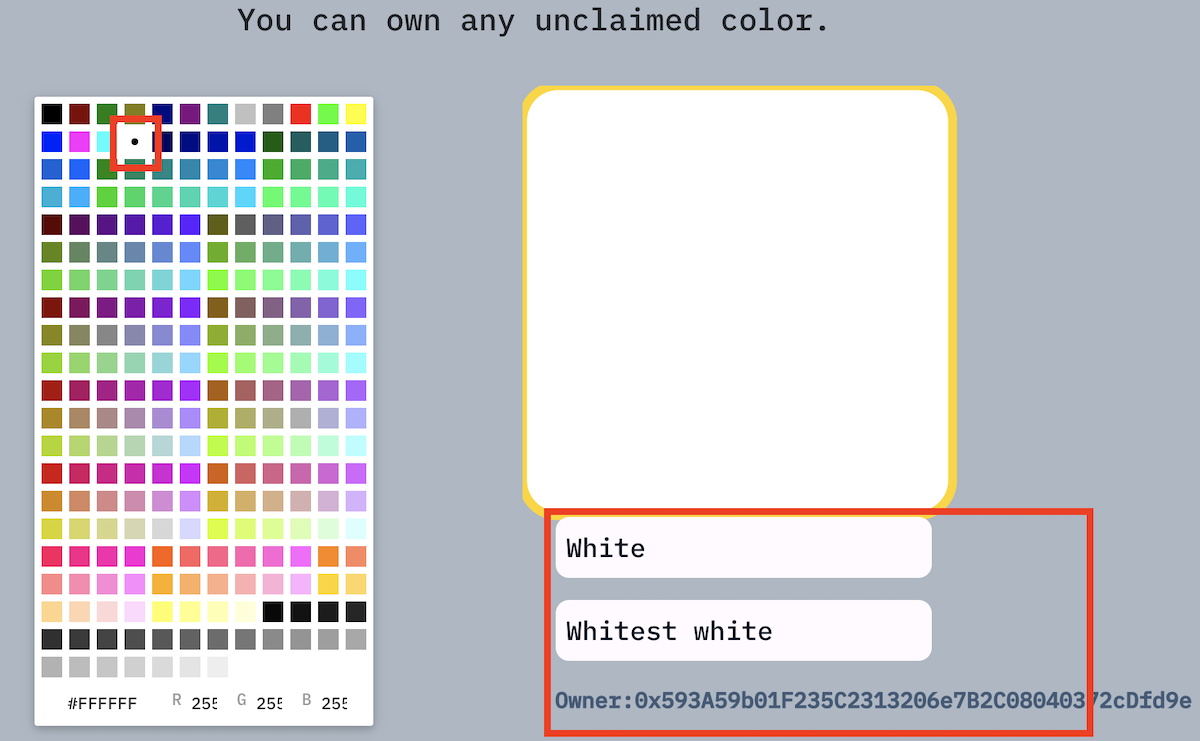
If a token is already taken, the UI renders a simple SVG (from the JSON metadata) and the token’s details (retrieved from the
NFT contract). We can select any color which has been pre-minted on contract deployment or we have claimed manually
in the steps above.
If a token is free, then we can see a claim form.
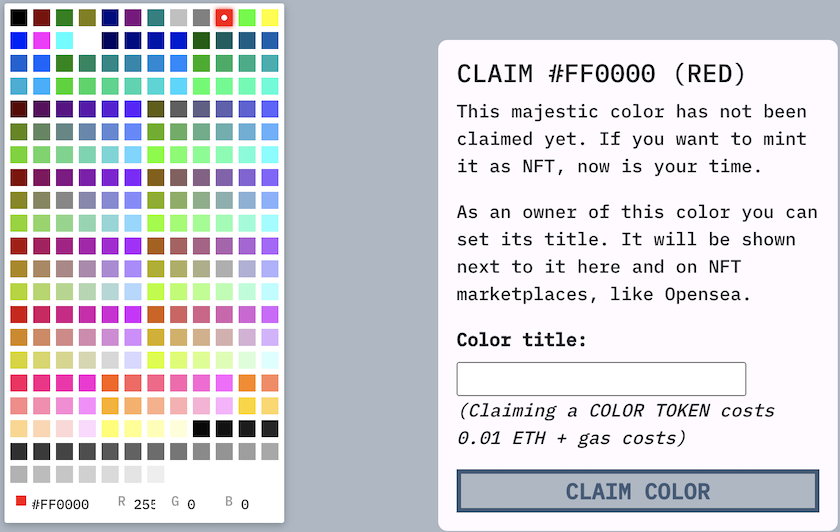
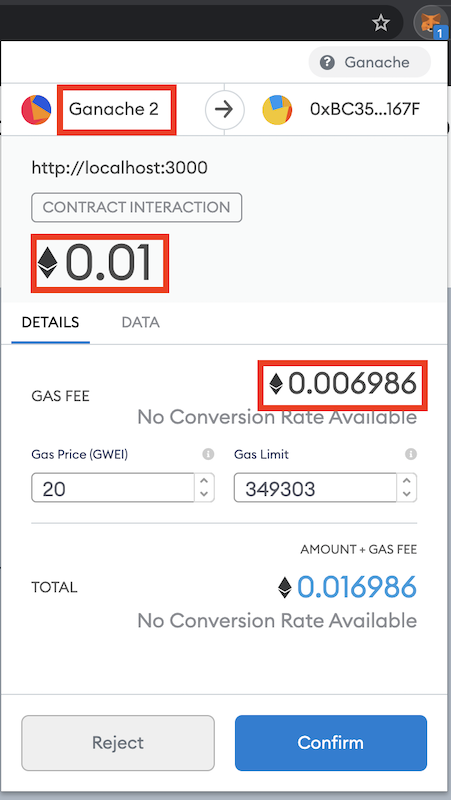
When we claim, it prompts our current account in Metamask to accept the cost of the transaction (0.01 ETH requested by
the contract, plus gas fees for the execution of the method).
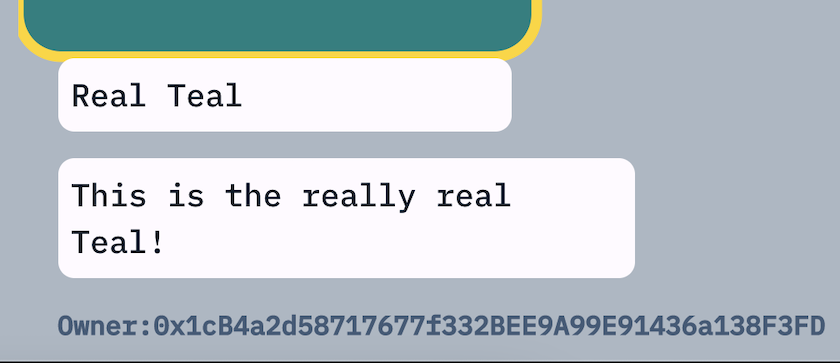
When the transaction is complete (i.e. Ganache has mined the new block), we can see the transaction in Metamask…
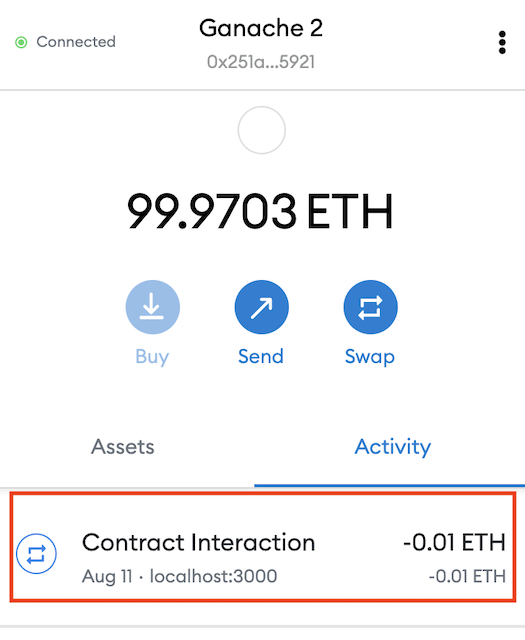
and our dApp showing the new owner.
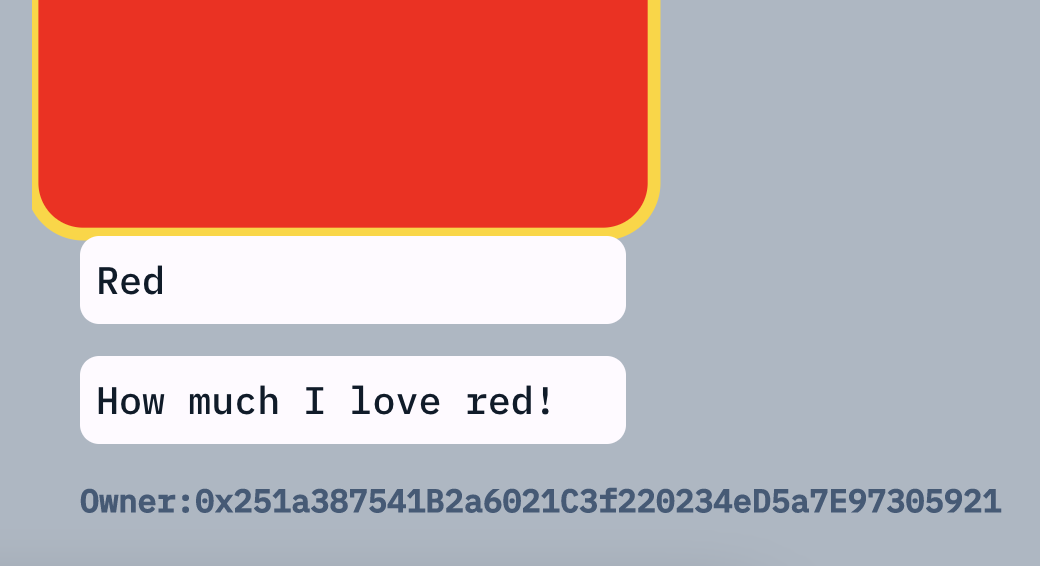
Awesome result!
Parting thought

Photo by Anton Shuvalov on Unsplash
And that’s it!
We covered a LOT of ground and tooling in this post.
Despite the recent hype and exuberance, NFTs can enable the tokenisation and digitisation of real-world scarcity. This can enable use cases that were previously impossible and unlock value that was previously unreachable.
In a future post, we will conclude this guide by deploying our NFT on a marketplace.
Happy coding!
Footnotes
- In practice the Xterm color list has 9 duplicate color codes (e.g.
#0000ffhas ids 12 and 21).
We will omit these in our client-side implementation. This brings the available number of colors to 245. It also opens the way for some “exploits” from the client side (claiming a color id that should not be available). - The observant reader will have noticed that the 2nd argument in the example command (
Teal Teal Teal) does not match the Xterm canonical color name, as we had specified in our instructions. Yet it succeeds.
There is a missing check in the contract, which is left as an exercise to the reader.
Annex 1: Installing Metamask and connecting to Ganache
This short guide assumes you are starting from scratch.
If you already have Metamask installed, then you can just skim through it.
Let’s start by installing the Metamask browser extension from the official website.
-
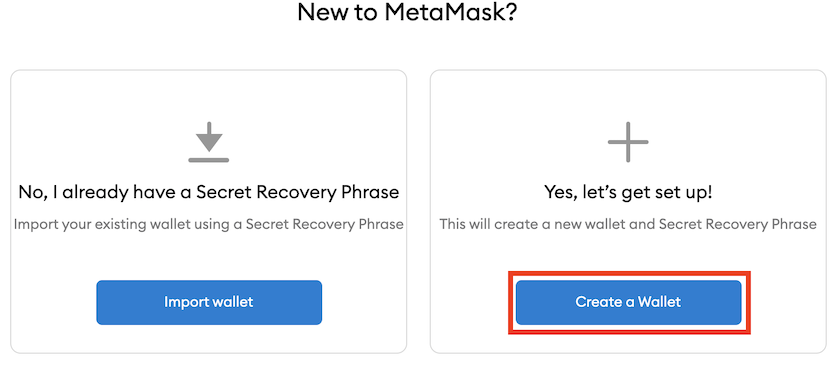
It launches a setup wizard. Create a new wallet.
-
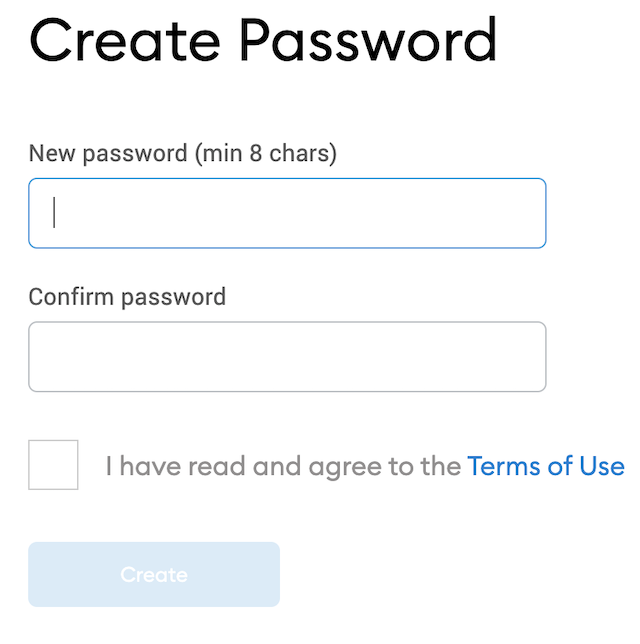
Your local wallet will be password-protected. Select a phrase.
-
Make a note of the recovery phrase; we will need it later on.
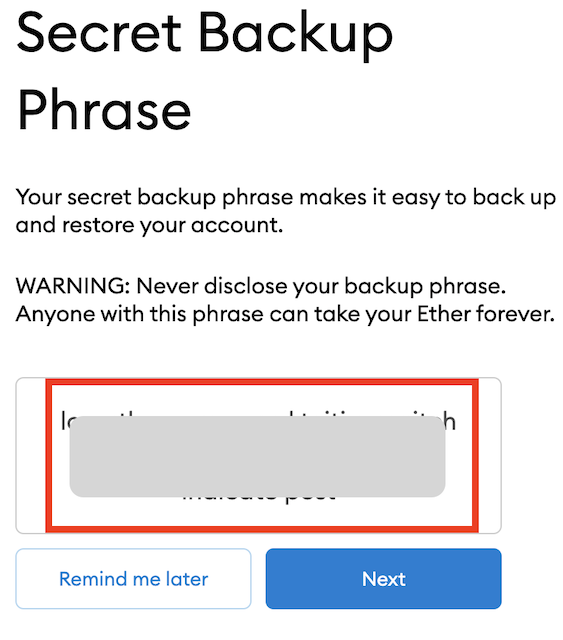
You will be asked to confirm your knowledge of the phrase. -
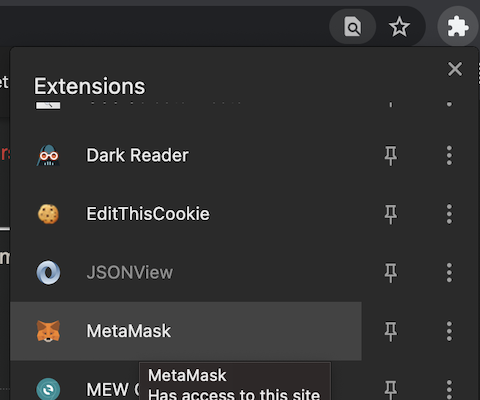
Metamask is now installed in your browser’s extensions panel.
-
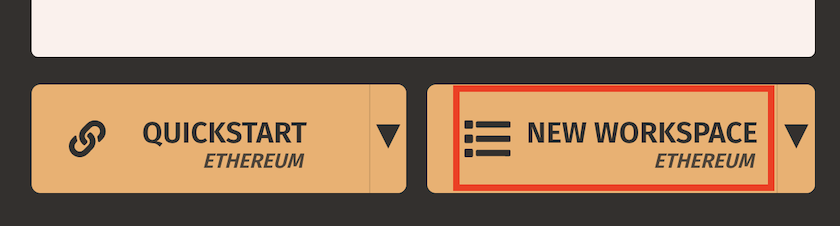
Let’s create a connection to our local Ganache instance.
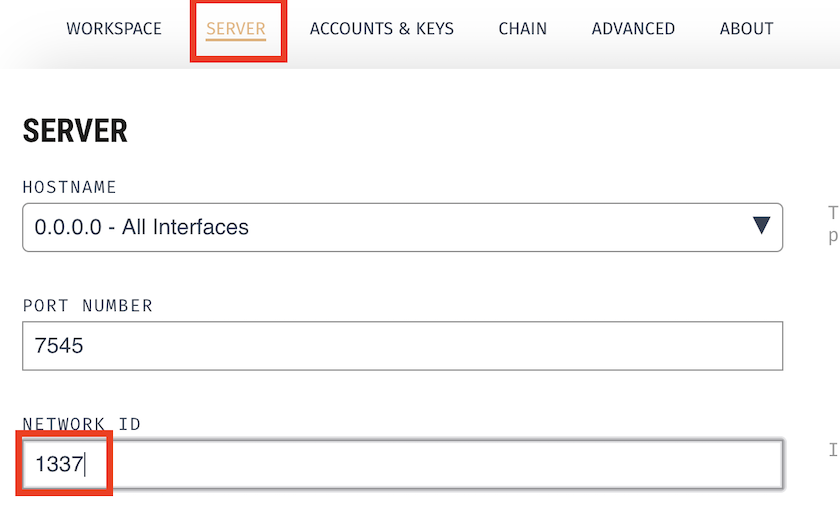
At the time of writing this, Metamask can only work with a local network having an id1337. In Ganache this can be done by creating a custom workspace.
 …and setting the id in the “Server” tab.
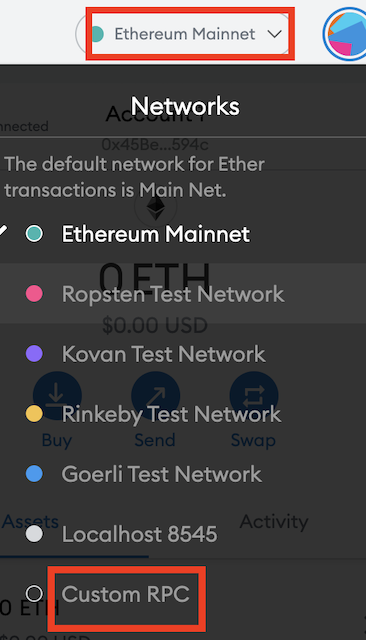
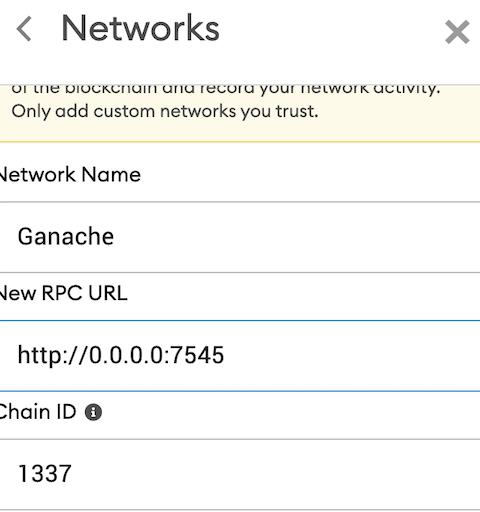
Once saved, we can create a new network connection in Metamask
…and add the correct settings.
-
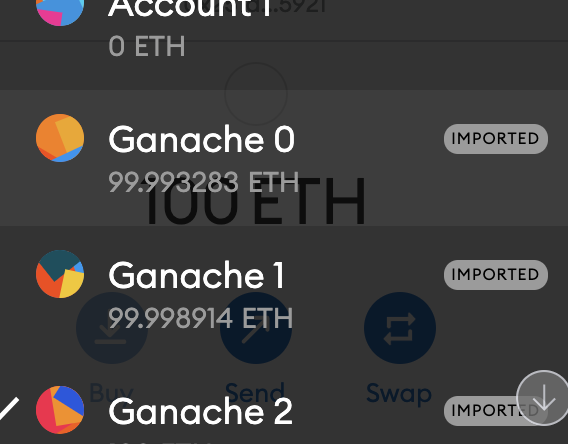
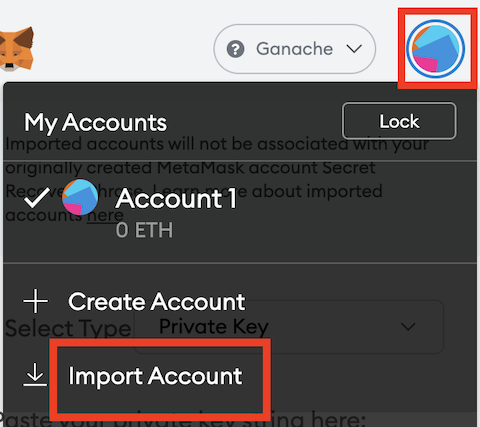
Final step is to import the auto-created Ganache accounts in Metamask.
Click on the “Accounts” icon and “Import account”.
-
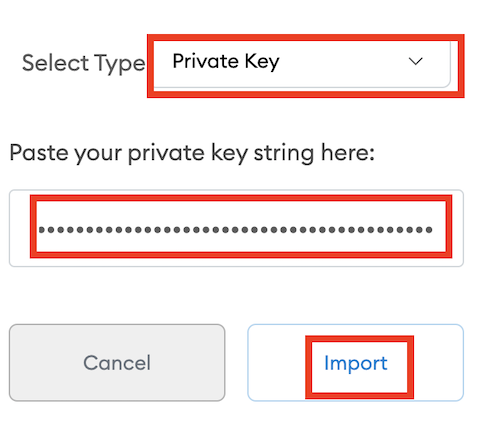
In Ganache, click the key icon next to an account and copy the private key.
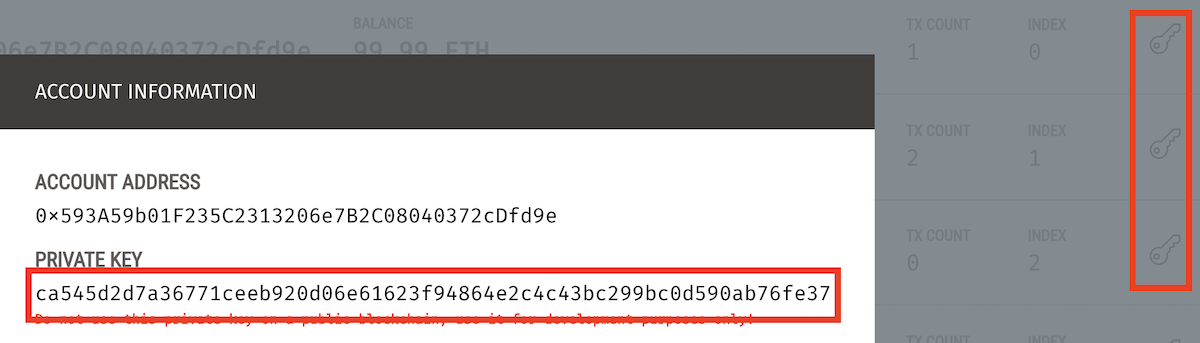
Paste it into the Metamask box
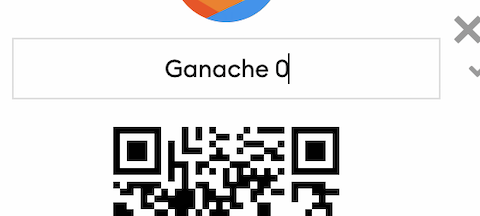
 …and give it an appropriate name.
-
Repeat the import for a few more of the Ganache accounts.